Bathroom Refit - Leaking Shower Tray and the problems it causes, Part 3.
This is the final post in our blog on the fix of a leaking shower tray and the fitting of a Sealux Seal and subsequent tanking of the walls. If you want to follow this project from start to finish you can check out Part 1 and Part 2
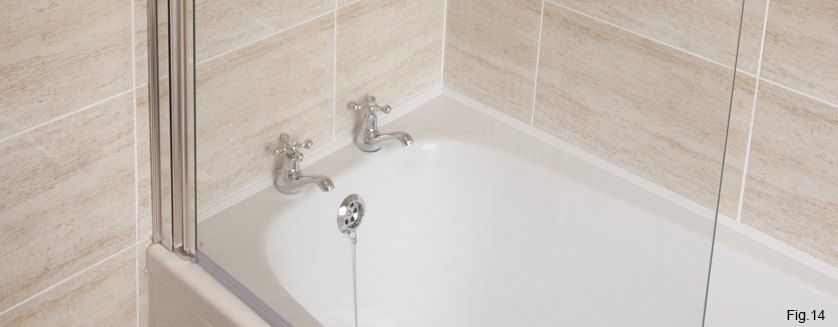
At this stage we have completed the fitting of a Sealux shower seal and tanking of the shower walls using a BAL Tanking Kit. We only needed a 2 sided shower seal installation meaning just tow mitre cuts of the Sealux trim. Tip: when cutting the mitres, use a good saw and not a saw that will bend and flex as this will not give the best cutting results. Hold trim firmly in the mitre box when sawing.
Tanking with the BAL Tanking Kit
Tanking with the BAL Tanking Kit is also a quick and easy job to carry out, if you can paint then you can tank.
Tiling is one of those jobs that the line 'a good start is half the job' is very apt. Measure up and plan the orientation/layout is critical with tiling. With the Sealux shower seal secured to the bath and wall we used this as our starting point for the first tile to be laid. From this tile we will work horizontal with the first row and then vertically, this is shown in Fig. 12

Without going into the tiling process as that would be beyond the scope of this post it was a relatively easy process to complete. Tip: When working over a newly fitted bath or shower tray it is advisable to protect it with old towels or cardboard. Tiles and tools can drop onto such and leave a mark.
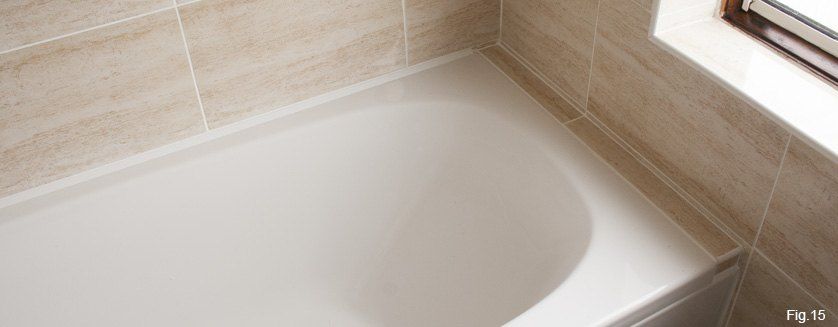
Once the tiling was completed then starts the grouting process. Using a grout remover it is advisable to remove any excess tile adhesive that may have settled between the Sealux trim and the underneath of the tile. This can be seen in Fig. 13. Once you have removed this, give it a quick rub down and you can use either a grout or bead of silicone to fill the gap. This is purely for aesthetics only and not for waterproofing as the Sealux seal itself is the waterproofing mechanism.
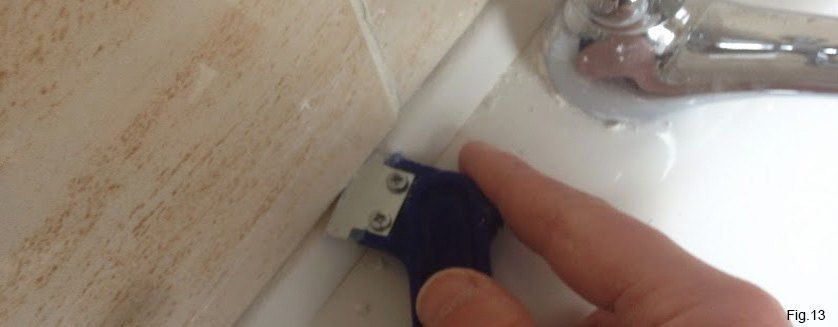
Grouting was completed and all tiles wiped down. We were able to use the original electric shower as it was in perfect condition. The bathroom has been totally transformed and even though the bath seal is a visibly very small item in the overall scheme of things it is a crucial feature that will prevent any leaks between the tiles and bath.
Summary of Project
- Establish that leak was from shower tray and very badly installed by 'tradesman'
- Decide to replace shower tray with a bath, place electric shower over bath on new wall
- Remove all tiles and fit bath
- Fit Sealux shower seal and tanking of the shower walls using a BAL Tanking Kit.
- Tile and Grout
- Stand back and enjoy a job well done.